Craving a sweet treat that’s both easy and delicious? You’re in the right place! This No-Bake Matcha Cheesecake is creamy and simple, perfect for anyone—especially if you love matcha. I will guide you through each step, from choosing quality ingredients to achieving the perfect texture. Whether you’re a novice in the kitchen or a seasoned chef, you’ll enjoy this delightful recipe. Let’s dive in and create something special together!
Ingredients
Complete List of Ingredients
To make your no-bake matcha cheesecake, gather these items:
– 1 cup graham cracker crumbs
– 1/4 cup unsalted butter, melted
– 2 cups cream cheese, softened
– 1 cup powdered sugar
– 1/2 cup heavy whipping cream
– 2 tablespoons matcha green tea powder
– 1 teaspoon vanilla extract
– Pinch of salt
– Fresh berries and mint leaves for garnish
Substitutions for Common Ingredients
You can swap some ingredients while keeping the taste great. Here are a few ideas:
– Use almond flour instead of graham cracker crumbs for a gluten-free crust.
– Coconut oil can replace unsalted butter for a dairy-free option.
– For a lighter option, use low-fat cream cheese instead of regular.
– Granulated sugar works if you don’t have powdered sugar, but it may change the texture slightly.
Tips for Choosing Quality Matcha
When picking matcha, focus on these key points:
– Look for vibrant green color. The brighter the green, the fresher the matcha.
– Choose matcha labeled “ceremonial grade” for the best taste and quality.
– Check for a fine texture. Quality matcha should feel silky, not gritty.
– Buy from trusted brands or specialty shops to ensure authenticity.
Step-by-Step Instructions
Preparing the Graham Cracker Crust
To start, you need to make the crust. Grab a mixing bowl and add one cup of graham cracker crumbs. Then, pour in one-fourth cup of melted unsalted butter. Mix well until the crumbs soak up the butter. It should feel moist and look clumpy. Next, press this mixture firmly into the bottom of a 9-inch springform pan. Make sure it’s even. This helps the crust hold together. Now, place the pan in the refrigerator to chill while you prepare the filling.
Making the Cheesecake Filling
Now, let’s focus on the filling. In a large bowl, take two cups of softened cream cheese. Use an electric mixer to beat it until smooth and creamy. This makes the cheesecake rich and fluffy. Gradually add one cup of powdered sugar and mix well until it blends in completely.
Next, mix two tablespoons of matcha green tea powder with a pinch of salt. Add two tablespoons of warm water to this mix and whisk until smooth. Slowly pour this matcha mixture into your cream cheese. Blend until everything is fully mixed.
In a separate bowl, whip half a cup of heavy whipping cream until soft peaks form. This step makes your cheesecake light. Gently fold this whipped cream into the matcha cream cheese mixture. Be careful not to deflate the whipped cream. You want to keep the air in for a fluffy texture.
Assembling and Setting the Cheesecake
Now, it’s time to assemble the cheesecake. Pour the matcha cheesecake filling onto the chilled graham cracker crust. Use a spatula to smooth the top. Cover the pan with plastic wrap and place it back in the fridge. Let it set for at least four hours, or better yet, overnight. This helps the flavors meld and the cheesecake firm up nicely.
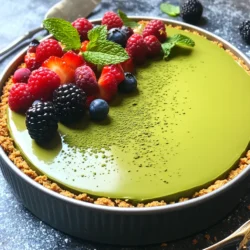
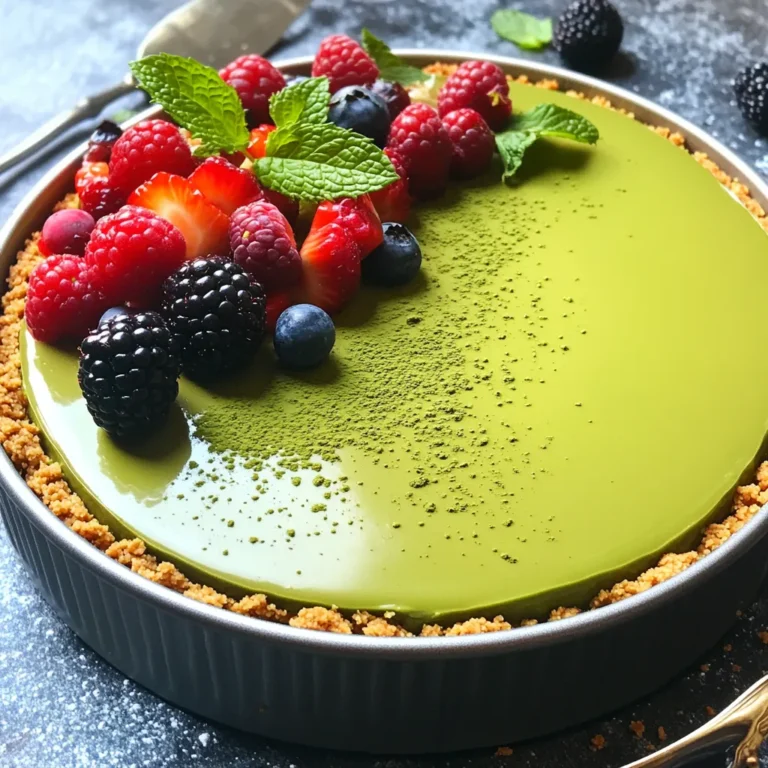
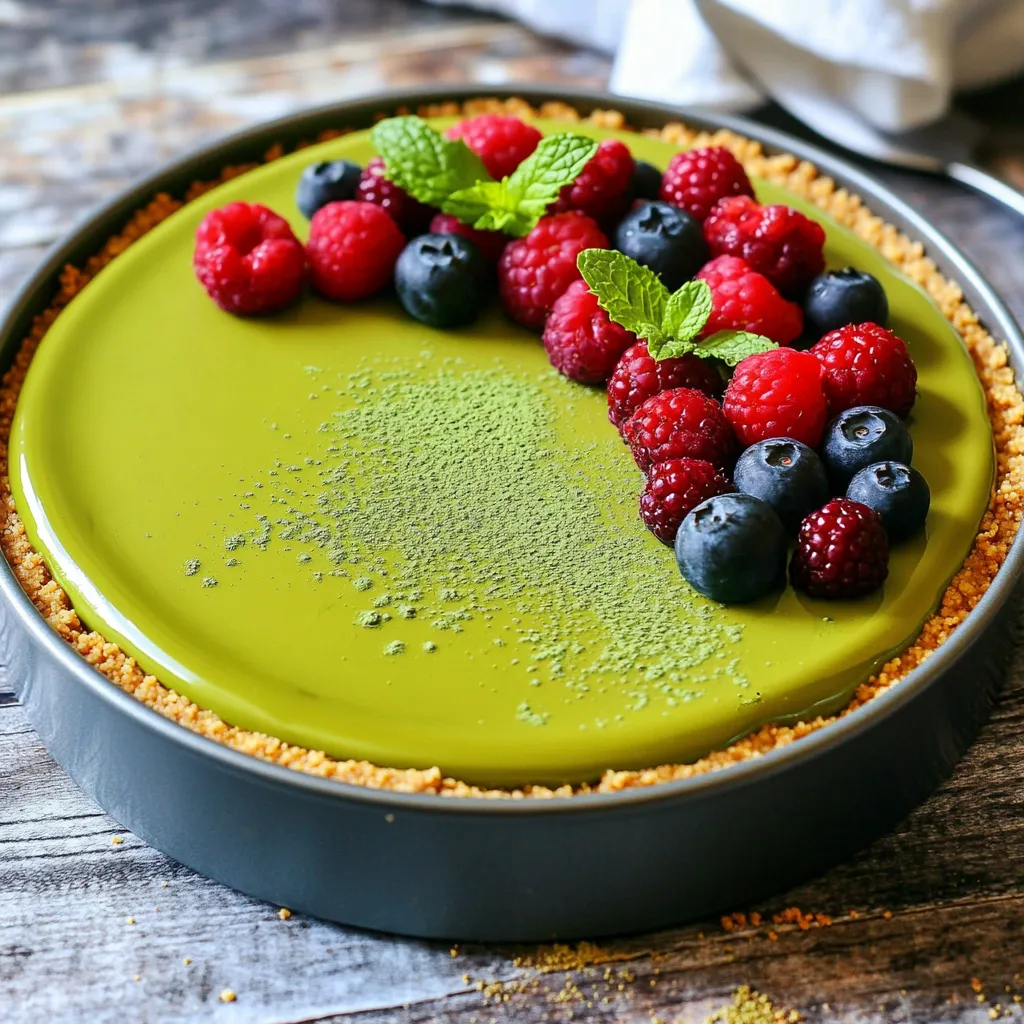
When it’s ready, remove the cheesecake from the springform pan. Slice it into pieces, and for a lovely touch, garnish with fresh berries and mint leaves. Enjoy this creamy delight!
Tips & Tricks
Common Mistakes to Avoid
When making no-bake matcha cheesecake, avoid a few common mistakes. First, don’t overmix the cream cheese. This can make it too airy and fluffy. Keep your mixture smooth without adding too much air. Second, ensure your matcha is fresh. Old matcha can taste bitter and dull. Always check the color; bright green is best. Lastly, let your cheesecake set long enough in the fridge. If you rush this step, the texture will suffer.
How to Achieve the Perfect Texture
To get that creamy, smooth texture, follow a few key steps. Start with softened cream cheese at room temperature. This helps it blend easily. Whip the heavy cream until you see soft peaks. This adds lightness to the cheesecake. When folding the whipped cream into the matcha mixture, use a gentle hand. This keeps the mixture airy and light. The right balance between the cream cheese and whipped cream gives the cheesecake its perfect texture.
Recommended Tools for Best Results
Using the right tools can make your cheesecake better. A 9-inch springform pan works best for easy removal. An electric mixer helps you beat the cream cheese smoothly. A rubber spatula is great for folding in the whipped cream without deflating it. Lastly, a whisk is key for mixing the matcha powder. These tools will help you make a cheesecake that is not only tasty but also visually appealing.
Variations
Using Different Flavors (Chocolate, Fruit)
You can switch up the flavors in your no-bake matcha cheesecake. For a chocolate version, mix in cocoa powder. Start with 1/4 cup of cocoa powder in the cream cheese mix. This creates a rich, chocolaty taste. You can also add melted dark chocolate for extra depth. For a fruity twist, try adding pureed fruits, like strawberries or mangoes. Blend the fruit into the cream cheese mix for a refreshing flavor. You’ll have a cheesecake that surprises your taste buds!
Adjusting Sweetness Levels
Not everyone enjoys the same level of sweetness. If you want a less sweet cheesecake, cut back on the powdered sugar. Start with 3/4 cup instead of 1 cup. Taste the filling as you go. You can also use a sugar substitute like honey or maple syrup. Just remember to adjust the amount since these can be sweeter than sugar. Finding the right balance makes your dessert enjoyable for everyone.
Gluten-Free and Vegan Options
Making your cheesecake gluten-free is simple. Use gluten-free graham cracker crumbs for the crust. These are easy to find in stores. For a vegan version, swap cream cheese with vegan cream cheese. You can use coconut cream in place of heavy whipping cream. Just whip it until fluffy. Also, make sure your sweetener is plant-based. With these swaps, you can enjoy a delicious cheesecake that fits your dietary needs!
Storage Info
Best Practices for Refrigeration
Keep your no-bake matcha cheesecake in the fridge. Wrap it tightly in plastic wrap. This keeps it fresh and prevents it from absorbing other odors. Store it at a temperature below 40°F. When you are ready to serve, just unwrap it and enjoy!
How to Store Leftovers
If you have leftovers, slice the cheesecake into pieces. Place each piece in an airtight container. You can also use plastic wrap. Leftovers can last for up to three days in the fridge. Always check for any signs of spoilage before eating.
Freezing Instructions
You can freeze no-bake matcha cheesecake for longer storage. Wrap the whole cheesecake or slices in plastic wrap. Then wrap it in aluminum foil for extra protection. Label it with the date. It can last up to three months in the freezer. To thaw, place it in the fridge overnight before serving.
FAQs
Can I make this cheesecake ahead of time?
Yes, you can make this cheesecake ahead of time. In fact, it tastes better after sitting. I recommend making it a day before you plan to serve. This gives it time to chill and set properly. Just cover it well in the fridge. This keeps it fresh and helps it hold its shape.
How long does No-Bake Matcha Cheesecake last?
No-Bake Matcha Cheesecake lasts about 3 to 5 days in the fridge. Make sure to store it in an airtight container. This helps keep it from drying out. If you notice any changes in smell or texture, it’s best to throw it away.
Can I use different types of sweeteners?
Yes, you can use different sweeteners in this cheesecake. If you prefer sugar alternatives, try using honey, maple syrup, or agave nectar. Just remember, the sweetness level may change. Start with less and adjust to your taste.
This blog provided a clear path to making a delicious no-bake matcha cheesecake. We covered the key ingredients, the steps to create the cheesecake, and several tips for success. You learned how to avoid common mistakes and explore flavors. Stored correctly, your cheesecake can last and remain tasty. Enjoy your dessert adventure, and remember, making this treat can be fun and rewarding!