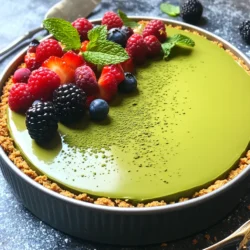
No-Bake Matcha Cheesecake
Indulge in a delightful No-Bake Matcha Cheesecake that's as easy to make as it is delicious! This creamy dessert combines rich cream cheese with the earthy flavor of matcha, layered over a buttery graham cracker crust. Perfect for any occasion, it’s topped with fresh berries for a burst of color. Ready to impress your friends? Click to explore this simple recipe that will elevate your dessert game!