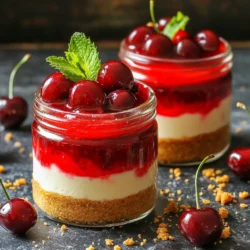
No-Bake Cherry Cheesecake Jars
Indulge in a delightful treat with these No-Bake Cherry Cheesecake Jars! This easy recipe combines a buttery graham cracker crust, creamy cheesecake filling, and sweet cherry topping, all layered in charming jars. Perfect for parties or a sweet solo treat, these jars are sure to impress. Follow our simple steps to create this refreshing dessert, and click through to explore the full recipe and make your own delicious jars today!